
Bake On! Raspberry Lemon Dome Entremet Kit – Fun in the Kitchen

One of my Christmas presents this year was a box o’fun from Bake On! I can’t remember where I first saw them but I knew that I would have a blast if he put one under the tree for me. And so he did – the Raspberry Lemon Dome Entremet Kit.
Read on to learn how it went, how I did, and whether they tasted as good as they looked.
Happy New Year everyone. I will be back with a new post on 1/3/23. Enjoy your celebrations!

Bake On! Raspberry Lemon Dome Entremet Kit
Everything you need to make this beautiful and delicious dessert is included in the kit on the BakeOn! website. If you sign up for emails while there you can get 20% off of your first kit – at least at the time I wrote this.
As you peruse the site you will find a variety of kits available for purchase; from the lemon raspberry I am showing to chocolate peppermint, maple salted caramel, and chocolate coffee. Once you purchase one kit you can then buy filler kits so you don’t end up with multiple sets of molds.
Challenging, But Fun
I had a lot of fun making this entremet dessert. If the word is new to you it means a cake layered with mousse, jam, custard, and other fillings. It’s not your everyday bowl of ice cream, that’s for sure.
I have long been intrigued by them (entremets) since seeing them on The Great British Baking Show. Since I have 4,009 cookbooks I probably could have found a recipe and tried to make one but I think this was probably the better way to approach my first. The kit gave me everything I needed plus step by step instructions.
Note: This post may contain affiliate links, which means if you buy from my link I might make a small commission. This does not affect the price you pay. See the full affiliate disclosure here.

Now that I have made one I will look to my cookbooks, most likely my (affiliate link) Patisserie: Mastering the Fundamentals of French Pastry. If not there I can move on to several other options.
But on to my Bake On! Kit. It really was a world of fun but I can say that I am glad I had some experience in the kitchen before I tackled it.
The end result was mighty tasty but here are the components:
- Baking almond dacquoise cookies for the base
- Making lemon curd to freeze for the center
- Whipping up a raspberry mousse for surrounding the lemon curd
- Making a mirror glaze
Of all of those steps the only thing I hadn’t done before was make the mirror glaze. I had never done them all together mind you, but I had done them as part of other recipes.
The box was AWESOME it had most of what was needed beyond things like the fresh raspberries and lemons, and basics like sugar, water, and things like that. It included the molds, piping bag, sieves and even a spatula that you can add into your baking supplies for future use.
If you choose to try another dessert you can order “filler kits” which come with the ingredients but not the equipment – because you already have them! Salted Maple Caramel sounds delicious, doesn’t it?
Next month the kit has a whole different shape of mold – a heart, of course – and I am most intrigued. It’s for Hazelnut Salted Caramel Chocolate Hearts.
Mmmmmm. We shall see.

Making the Entremet
I might be remembering things in the wrong order but as I am not giving you the exact recipe – eh. The dacquoise cookie bases were baked and then cooled so they could be added at the end. There were enough so that if errors were made, they could be eaten and there would be no problems at the end.

Then a wonderfully tart lemon curd is made. The husband loves, loves, loves anything lemon so he was very happy with this step and especially enjoyed “licking the bowl” when I was finished. It was poured into a mold and sent to the freezer.

Next up, a light and airy raspberry mousse. I adore making mousse for dessert. It’s like eating the most delicious flavored cloud. I had never made a fruit mousse before and now I know I will make them again. Sooooo good.
After all the steps are followed – and if you are having any issues whatsoever, you can find video tutorials to help you. This was my only complaint with the kit – these were a little challenging to track down as the the QR codes include did not work. But the husband came through and found them on the website for me.
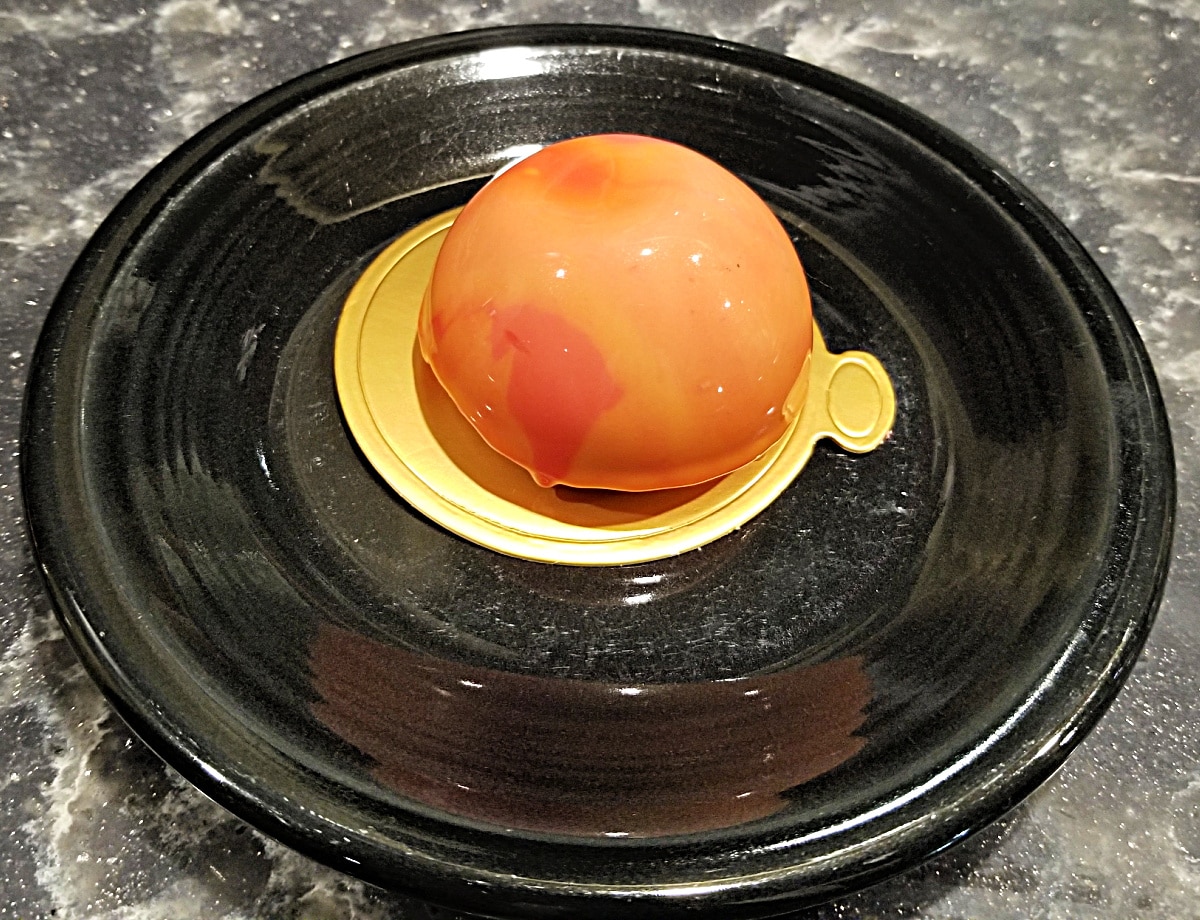
Final Dessert
After it is all put together, the dessert is frozen and the mirror glaze is poured over top. I have to admit I was quite pleased with how they turned out! I will admit that I managed to crush one in the freezer as I was opening the door. Bummer – I had to eat it. What a shame, right? Hahahahaha.
I served these for dessert last night and we both enjoyed them. The overall flavor was not too sweet – I was a little concerned that it would be but the lemon curd and raspberries in the mousse helped to tame the white chocolate in the mirror glaze.

Cutting it open allowed for the drama I wanted as all of the layers showed themselves off quite well. I must admit I was rather pleased with myself.
It was a long day in the kitchen but I thoroughly enjoyed myself, I have some fun new toys to use at a later date, I have picked up some new skills and we had a tasty dessert for a few nights to enjoy.
All in all a wonderful Christmas present from the husband. Plus he has leftover frozen lemon curd balls on which to snack and that also makes him very happy. So definitely a win/win.


