Kitchenaid Bread Bowl Recipe

Is there anything quite like the aroma of freshly baked bread wafting through your home? We don’t think so. Today, we’re diving into the delightful world of bread baking with the KitchenAid Bread Bowl Recipe.
In this blog post, we’ll walk you through the art of crafting your very own homemade bread with the KitchenAid Artisan Bread Bowl with Lid. From mixing and kneading to proofing and baking, everything happens right in this versatile bowl.
Get ready to fill your kitchen with the comforting scent of freshly baked bread and enjoy the satisfaction of creating a true homemade masterpiece. Let’s begin!
Note: This post may contain affiliate links, which means if you buy from my link I might make a small commission. This does not affect the price you pay. See the full affiliate disclosure here.
Ingredients Required for Kitchenaid Bread Bowl Recipe
- 2.5 cups of all-purpose flour
- 2 ¼ teaspoons of active dry yeast
- 1 ½ teaspoons of salt
- 1 ¼ cups of warm water (approximately 110-115 degrees Fahrenheit)
Equipment & Tools Required
- KitchenAid Artisan Bread Bowl with Lid (4.8 liter ceramic bowl)
- KitchenAid Stand Mixer with dough hook
- Measuring cups and spoons
- Mixing bowl
- Baking paper (optional)
- Oven preheated to 225 degrees Celsius
- Timer
Preparation Time: 1 hour
Cooking Time: 30 minutes
Let’s Make Kitchenaid Bread Bowl Step by Step
Step-01: Mixing the Ingredients
Start by connecting the KitchenAid Artisan Bread Bowl to your stand mixer, fitting it with the dough hook. Add flour, yeast, and salt to the bowl. Mix at speed two until the yeast and salt are well combined. Gradually pour in warm water, and the dough will quickly form.

Step-02: Kneading the Dough
Once the dough forms, lower the mixer speed to one and knead for two to two and a half minutes. The slight tilting of the mixer head is normal; just ensure you don’t exceed speed two when working with dough in a head-tilt mixer.

Step-03: Proofing and Baking
After kneading, shape the dough into a ball, dust it with flour, return it to the KitchenAid Bread Bowl, cover with the lid, and let it proof in a warm place for an hour until it doubles in size.
Step-04: Baking
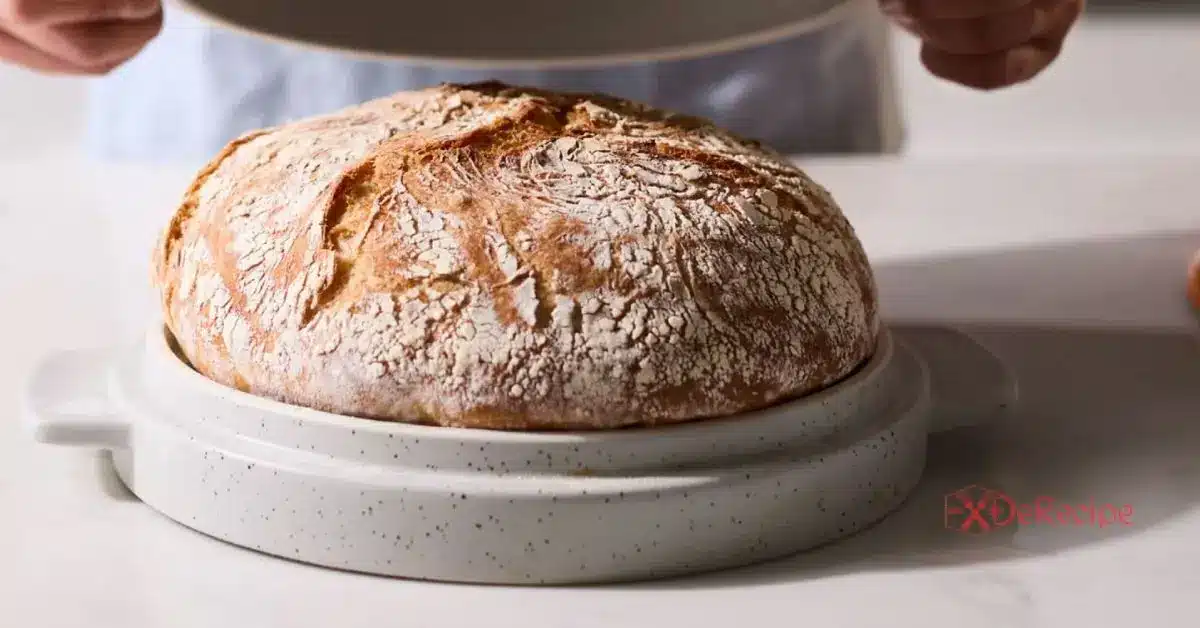
Following the final proof, flip the lid (the baking side) and gently transfer the dough onto it. Optionally, use baking paper. Then, put the bread, along with the lid, in a preheated oven at 225°C (approximately 437°F) for 30 minutes.

Once the timer goes off, your delicious homemade bread will be ready to enjoy. The lid creates a steam effect, giving your bread a perfectly crisp crust.
Please watch the provided video for a more comprehensive understanding.
Serving Ideas for Kitchenaid Bread Bowl
1. Classic Slices with Butter: Serve warm slices of your freshly baked bread with a pat of butter. The simplicity of buttered bread is a timeless and delightful choice.
2. Bruschetta: Turn your bread into bruschetta by topping it with diced tomatoes, fresh basil, garlic, olive oil, balsamic vinegar, and a sprinkle of salt and pepper.
3. Toast and Jam: Enjoy slices of your bread toasted and spread with your favorite fruit jam or marmalade for a sweet and comforting breakfast.
4. Sandwiches: Use your homemade bread to make delicious sandwiches. You can create classic combinations like BLT (bacon, lettuce, and tomato), grilled cheese, or even gourmet options with various spreads and fillings.
5. Bread Bowl for Soup: Hollow out a portion of your freshly baked bread and serve it as a bread bowl for hot soups like clam chowder, broccoli cheddar, or tomato soup.
6. Dipping Bread: Slice your bread and serve it with a selection of dipping options like olive oil and balsamic vinegar, flavored hummus, or a savory garlic butter.
7. Crostini: Thinly slice your bread, toast it, and top it with an array of toppings such as goat cheese and honey, smoked salmon and cream cheese, or roasted vegetables.
8. French Toast: Turn your bread into a delightful breakfast by making French toast. Dip slices of bread in a mixture of eggs, milk, and cinnamon, then cook until golden brown. Top with maple syrup and fresh fruit.
9. Bread Pudding: Transform your bread into a luscious dessert by making bread pudding. Combine the bread with eggs, milk, sugar, and your choice of flavorings like chocolate chips, raisins, or cinnamon for a decadent treat.
10. Cheese Platter: Slice your bread and serve it on a cheese platter with a variety of cheeses, dried fruits, nuts, and honey for a delectable appetizer or snack.
Some tips for Kitchenaid Bread Bowl Recipe
1. Use Fresh Ingredients: Ensure that your yeast is fresh and within its expiration date. Fresh yeast will yield the best results.
2. Temperature Matters: Use warm water (about 110-115 degrees Fahrenheit) when adding it to the dry ingredients. The correct temperature helps activate the yeast properly.
3. Follow the Recipe: While you can experiment with different bread recipes, it’s a good idea to start with the recipe provided with the KitchenAid Bread Bowl to understand its capacity and the size of the loaf it produces.
4. Kneading Time: When kneading the dough in the KitchenAid stand mixer, stick to the recommended kneading time. Over-kneading can lead to a tough texture, so avoid the temptation to extend this step.
5. Watch the Mixer Head: In a KitchenAid stand mixer, especially the head-tilt models, it’s normal for the mixer head to jump slightly when kneading dough. Just ensure the mixer doesn’t exceed speed two for kneading.
6. Proofing: Be patient during the proofing process. Allow the dough to double in size for the best results. You can place it in a warm, draft-free spot to encourage rising.
7. Baking Temperature: Preheat your oven to 225 degrees Celsius (435 degrees Fahrenheit) before placing the bread in it. A well-preheated oven ensures even baking and a crisp crust.
8. Optional Baking Paper: Using baking paper when transferring the dough to the lid can prevent sticking and make cleanup easier.
9. Handle with Care: When transferring the proofed dough to the lid, do so gently to avoid deflating the dough, which can affect the bread’s texture.
10. Serve Fresh: Once the bread is baked, allow it to cool slightly before slicing. Freshly baked bread is always best when enjoyed warm.
The KitchenAid Bread Bowl recipe opens the door to an effortless and rewarding journey into the world of homemade bread. This innovative accessory, designed for KitchenAid stand mixers, simplifies the entire bread-making process, from mixing and kneading to proofing and baking.
The KitchenAid Bread Bowl empowers both novice bakers and experienced home chefs to enjoy the satisfaction of warm, crusty bread right from their own ovens. Its versatility, with a ceramic bowl that’s microwave, dishwasher, freezer, and oven safe, ensures that your bread-making experience is convenient and enjoyable.
So, whether you’re experimenting with your own unique recipes or following the provided instructions, this bread bowl is your reliable partner in creating artisanal bread at home. Say goodbye to store-bought loaves and embrace the joy of homemade bread. Happy baking!
FAQs on Kitchenaid Bread Bowl Recipe
Here are some commonly asked questions and their short answers on Kitchenaid Bread Bowl Recipe
1. How do you use the KitchenAid bread bowl?
The KitchenAid bread bowl is used as an attachment for your KitchenAid stand mixer to knead and mix bread dough.
2. Can you make bread dough in a KitchenAid?
Yes, you can make bread dough in a KitchenAid by using the KitchenAid bread bowl attachment, which is designed for mixing and kneading dough.
3. How do you mix KitchenAid bread dough?
To mix bread dough in a KitchenAid, attach the bread bowl, add your ingredients, and use the dough hook attachment on a low to medium speed setting until the dough is well-kneaded and elastic.
4. What is KitchenAid bread bowl made of?
KitchenAid bread bowls are typically made of stainless steel, which is durable and easy to clean.
5. Can I use the KitchenAid bread bowl for other recipes besides bread?
While the primary purpose of the KitchenAid bread bowl is for bread dough, you can also use it for pizza dough, pasta dough, and certain types of heavy cookie dough.
6. What size KitchenAid mixer is compatible with the bread bowl attachment?
The KitchenAid bread bowl attachment is compatible with most KitchenAid stand mixers, regardless of their size, including the popular Artisan and Professional series.
7. Do I need to hand-knead the dough after using the KitchenAid bread bowl?
In most cases, the KitchenAid bread bowl does an excellent job of kneading dough thoroughly, so additional hand-kneading is not necessary.
8. Can I make gluten-free bread dough in a KitchenAid using this attachment?
Yes, you can make gluten-free bread dough in a KitchenAid using the bread bowl attachment. Be sure to follow a gluten-free bread recipe for best results.
9. Is the KitchenAid bread bowl dishwasher safe?
Most KitchenAid bread bowls are dishwasher safe, but it’s always a good idea to check the specific care instructions provided with your attachment to ensure proper cleaning.
10. Can I make sweet bread or pastry dough in the KitchenAid bread bowl?
Yes, you can make sweet bread and pastry dough using the KitchenAid bread bowl attachment, as it’s versatile enough to handle a variety of dough types.
We always appreciate you taking the time to read this article, and we look forward to welcoming you back soon for more culinary explorations. Stay Connected with celebrateandhavefun. Happy Cooking!


