Easy DIY Fall Wood Pumpkin Decor With Scrapbook Paper
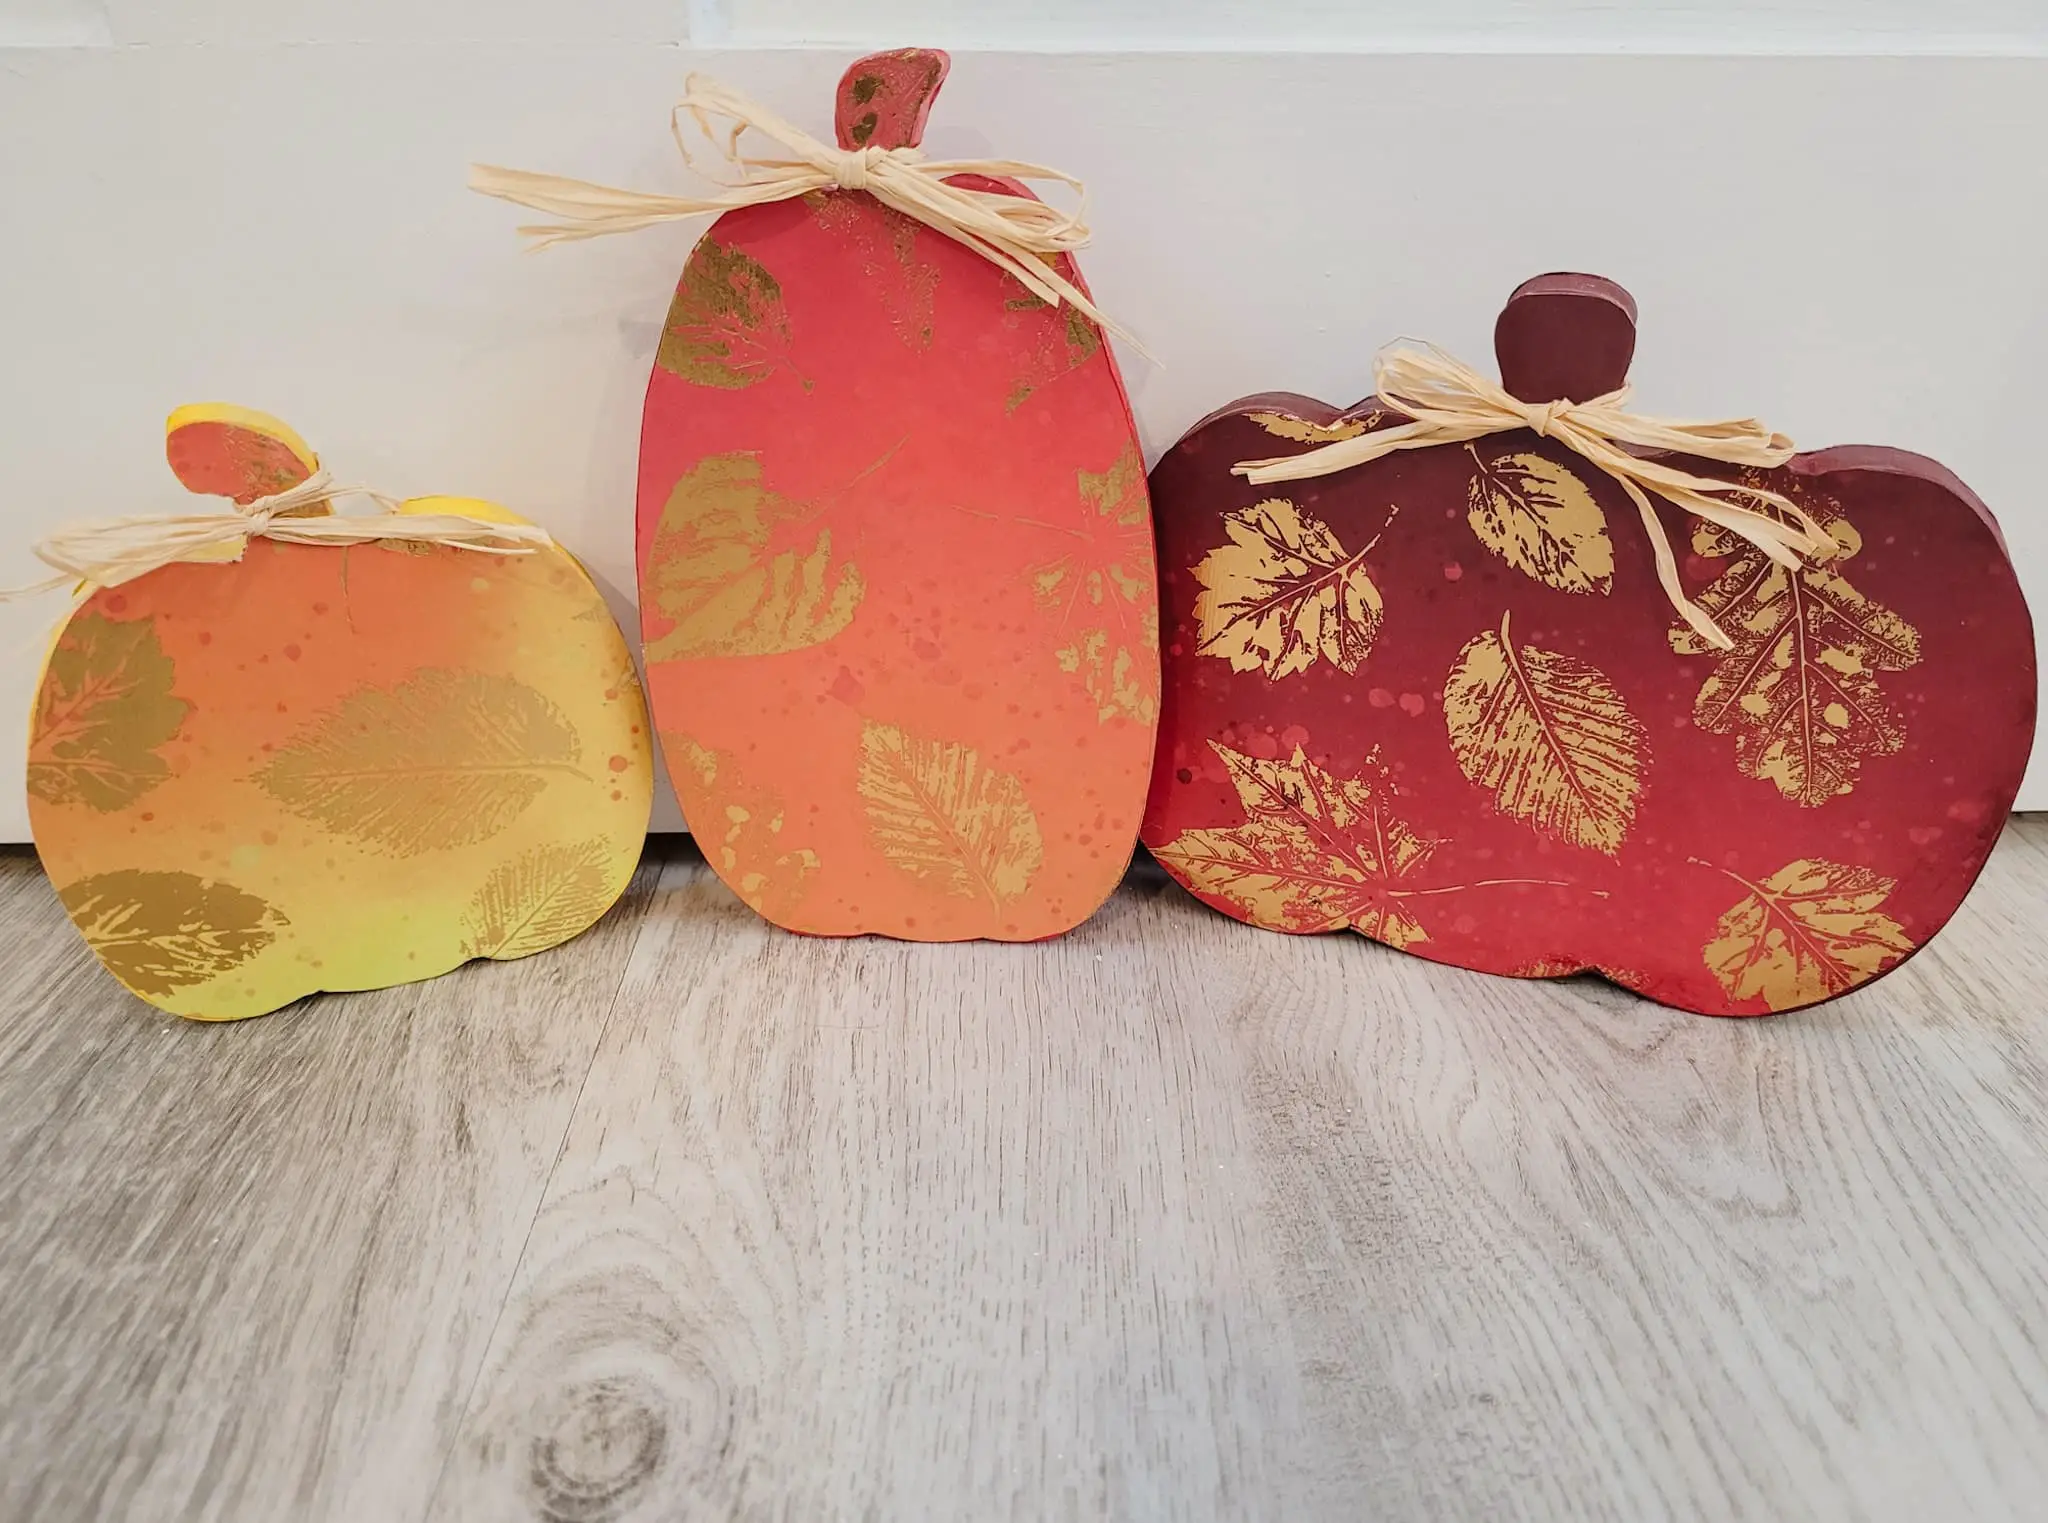
Today we are turning simple wood pumpkins into beautiful fall decor with a little paint, Mod Podge, and scrapbook paper. You can customize these autumn pumpkins by using the colors and cardstock of your choice to make them fit your home and style perfectly.
I absolutely love the 12×12” paper pads that are available in craft stores for scrapbooking. However, I don’t really scrapbook (yet). I had to come up with some projects to be able to use the beautiful autumn paper pad I found at Michaels.
So, here we are! I really wanted some pumpkin decor for our house this fall, but couldn’t find anything I loved. It’s always better when you make something homemade, right?
Note: This post may contain affiliate links, which means if you buy from my link I might make a small commission. This does not affect the price you pay. See the full affiliate disclosure here.

I picked an ombre cardstock paper with foil leaves on it for the front of my pumpkins. I used matching paper from the rest of the stack for the backs. The pumpkins turned out beautifully and are now brightening a corner of my living room this fall.
Let’s take a look at what you’ll need to make your own and how to do it!
Supplies You Need to Decoupage Wood Pumpkins
Making these wood pumpkins is really easy. You probably have most of the items you need in your crafting supplies already.
Here’s what you’re going to need:
- Wood pumpkins (I used these)
- Paint
- Scrapbook or cardstock paper
- Mod Podge (I used a matte finish)
- Paintbrush or foam brush
- Pencil
- Scissors
- Twine or ribbon (optional)

Notes on Supplies
Wood Pumpkins
You can use any wood or cardboard pumpkin cutouts for this project. I wanted pumpkins that could stand on their own so I used block pumpkins. You can find a lot of good options in craft stores, the dollar store, and online that would work great depending on how you want to use these to decorate.
Paper
You can use just about any paper for this project. The paper I chose came from a 12×12” paper pad with an autumn theme. You can use other paper including construction paper, printer paper, napkins, or even tissue paper for these.


Twine
You can finish off your pumpkins by tying twine, string, or ribbon around the stems to complete the look. However, you don’t need to. I was torn between leaving them without, but loved the twine that came with my pack of pumpkins. Ribbon or jute string would be really cute, too.
How to Make Wood Block Pumpkin Decor with Scrapbook Paper
Step One: Pick Your Paper
The first thing you’ll do is choose which paper you’d like to use to decoupage the pumpkins with. I chose an ombre page out of my pack and decided to use it on all three of my pumpkins.
I wanted each pumpkin to be lighter on the bottom and darker on the top. I used three different areas of the page so that each pumpkin would be different and range from light to dark themselves.
You can use the same piece or mix and match different sheets. It’s up to you and how you want your finished project to look. You can make the pumpkin blocks reversible so you can switch things up throughout the season.
Step Two: Trace Pumpkins Onto Cardstock
Trace each pumpkin onto the cardstock. If you’re going to be decoupaging both the front and back, make sure you trace the correct side onto the correct paper.

Pro Tip: You can cut the shapes out while the paint is drying from the next step.
Step Three: Paint the Sides of Your Pumpkins
If you’re using a flat pumpkin that hangs on the wall, you might not need this step. For the block pumpkins, I didn’t want thick bare sides or to have to try to decoupage the sides with thin strips of paper. So, I chose to paint them with some craft acrylic paint.
I chose paint that matched the main color of my scrapbook paper. I had to mix two colors for the orange paint since I didn’t have any that matched perfectly. Each pumpkin needed a different color since I had used different areas of the page.
Pro Tip: Paint the edges and a bit of the outside edge of both sides in case the paper isn’t cut perfectly. This will help hide any imperfections.

Let the paint dry before moving on to the next step.
Step Four: Cut Out Pumpkin Shapes
While you’re waiting for the paint to dry, you can go ahead and cut out all of the pumpkin shapes now.
If you happen to have a Cricut machine, you can make this process easier by letting your machine do the cutting for you. Since I haven’t figured out which machine I want, I cut this project out by hand.

Step Five: Glue Scrapbook Paper to Wood Pumpkins
Now that the sides are painted and you have your paper cut out, it’s time to glue the paper down to your pumpkins. Paint a thin layer of mod podge onto your pumpkin and press the paper cutout onto the wood.
Repeat this process until all of your pumpkins have the paper glued to the front (and the backs if you’re completing both sides). Let the glue dry before completing the next step. If you move on too quickly, the paper can get too wet and start to break down.


Step Six: Add a Final Coat of Mod Podge
In order to seal your project, you’ll need to add a thin coat of mod podge to the entire pumpkin. Get the front, back, and edges to make sure your pumpkins will last. You’ll need to wait for one side to dry before flipping your project.
I chose to use mod podge with a matte finish. However, you can use whatever sheen you’d like on your finished product.

Pro Tip: If you plan on using the pumpkins outdoors, you may want to add two final coats to ensure your pumpkins are protected against moisture and the elements.
Let the mod podge dry completely and then display your pumpkin decor.
Step Seven: Add Twine
If you’d like to add a little extra embellishment, you can tie twine or ribbon onto the stems of your pumpkins. The pumpkins I ordered came with their own twine so I tied a few pieces onto each in a bow and cut to the length I wanted.

DIY Wooden Pumpkins with Scrapbook Paper for Fall Decor
Materials
- Wood pumpkins
- Scrapbook paper or cardstock
- Paint
- Mod Podge
- Scissors
- Paintbrush or foam brush
- Twine or ribbon
Instructions
- Step One: Pick Your Paper
- Step Two: Trace Pumpkins Onto Cardstock
- Step Three: Paint the Sides of Your Pumpkins
- Step Four: Cut Out Pumpkin Shapes
- Step Five: Glue Scrapbook Paper to Wood Pumpkins
- Step Six: Add a Final Coat of Mod Podge
- Step Seven: Add Twine
Video
I hope you’ve had fun learning how to make these cute fall pumpkins for your home! If you end up making some of your own, I’d love to see your finished project!
If you need a fall centerpiece to compete your decor this season, I recommend making one of these easy faux flower centerpieces!


