How to Easily Dye Sola Wood Flowers in 3 Steps
Some sola wood flower retailers sell premade dye but I prefer to make my own. You can control the exact color and coverage this way. Plus it’s really fun and simple to experiment with a variety of colors and techniques.
What You Need to Dye Sola Wood Flowers
Sola flowers are dyed most often with paint. I have seen some creatives use things like coffee, wood stain, and natural ingredients to dye them too. For our purposes, we will stick with paint. Acrylic and latex paint are used most often. You can use either type with this tutorial
Note: This post may contain affiliate links, which means if you buy from my link I might make a small commission. This does not affect the price you pay. See the full affiliate disclosure here.

- Sola Wood Flowers
- Latex or Acrylic Paint
- Container or Ziploc Bag
- Gloves
- Water
- Drying rack or surface
- Paint brush (optional)
- Vegetable Glycerin (optional softener)
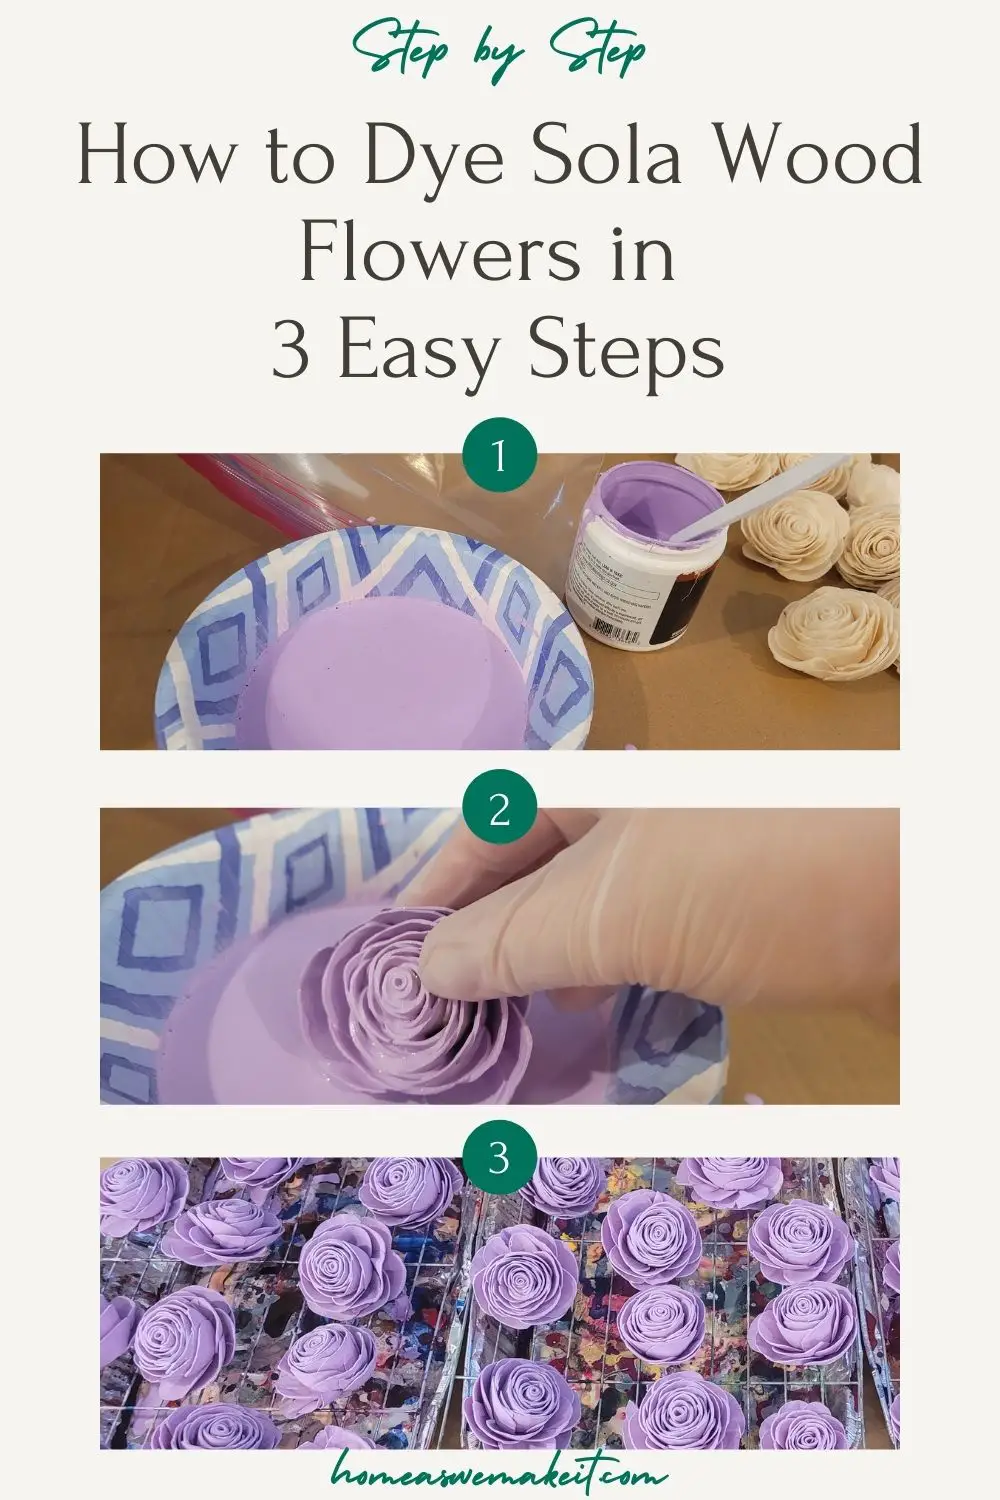
Step 1: Mix Your Paint
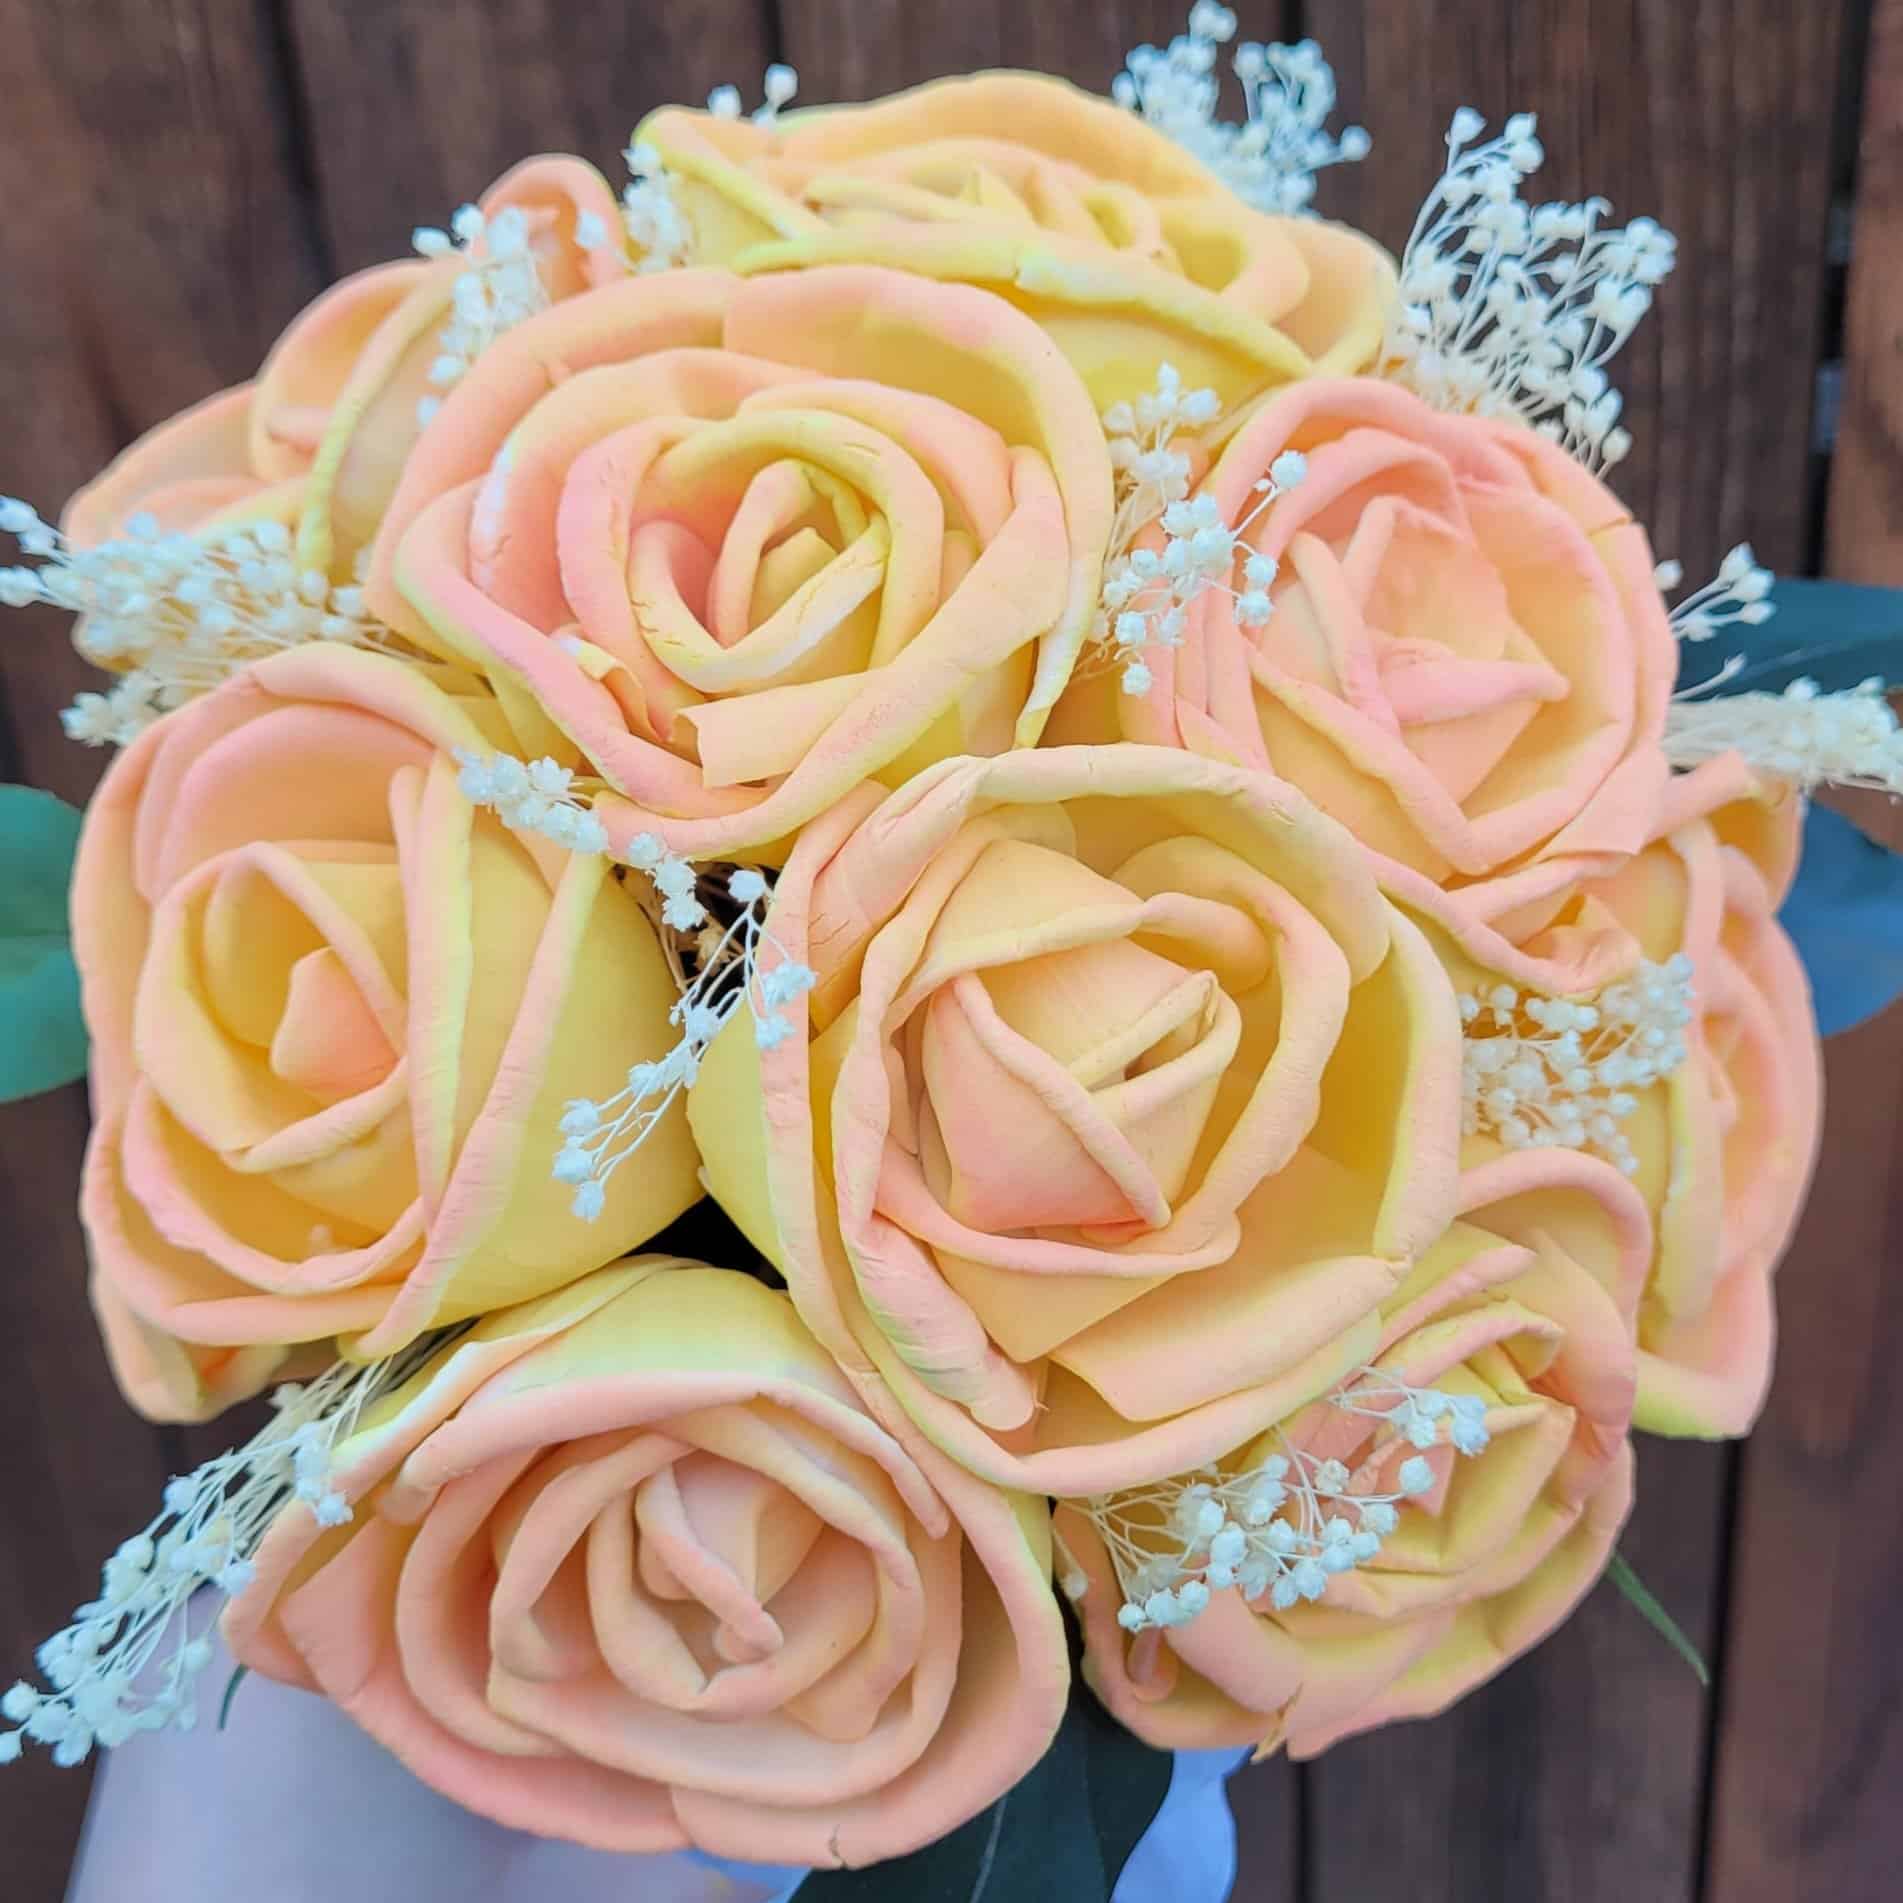
For this batch of flowers, I used latex paint. This one is a Behr brand from Home Depot but you are not limited to any certain brand. I’ve used different latex home paints and acrylic paints that have worked great.
It’s best to use a disposable container or Ziploc bag to mix the paint. When dyeing less fragile flowers, like these roses, I opt to use a Ziploc bag. Make sure that your paint is mixed well in the container before you add it to your container of choice. Then, slowly add in water and glycerin if you are using it.


Mixing the paint is kind of an experiment each time. Depending on the color and thickness of your paint, you will add more or less water. It’s best to mix a small sample batch first and test it out on a flower or loose petal first to make sure the coverage and color are what you want.
I usually start out with a 1:1 ratio of paint to water. For darker colors, you usually need a little more paint than water. For lighter colors, you can usually use less water. The consistency of your paint and water should be somewhat milky and not too thick. You should be able to easily cover the flower and let the excess paint drip off without being too thick.
How to Dye Sola Wood Flowers with Glycerin as Softener
Once you have the paint mixed, you can add vegetable glycerin to make the flowers softer and easier to work with later. This can help you avoid your flowers breaking as they can be brittle after dyeing them. If you would like to add glycerin, you can add it directly to your paint mixture. Only a small amount is necessary. I usually only add about 1/2 teaspoon to my mixture.
Be cautious and experiment with your flowers when adding softener. Too much can leave your flowers looking greasy. It can even make the paint color rub off on other things around it or cause the flowers to grow mold.
Step 2: Dip the Flowers
If using a container, such as a disposable bowl, you will dip each flower individually. This is best for beginners and experimenting. Each type of flower can be done a little differently. You just want to make sure that you scoop the paint mixture in a way that covers the entire part of the flower you are wanting to dye.


For these roses, I am using a Ziploc bag. With this easy technique, you can put multiple flowers in the bag at once. Then close the bag tightly and swish the paint mixture around until the flowers are covered. I usually do around 6 flowers at once this way depending on how big they are. I do not use this method for more fragile sola wood flowers.


You can use a paint brush or your fingers to cover any spots that did not get covered with the paint mixture. There are a lot of different painting techniques, but we are just dipping the whole flower in one color for this example.
Step 3: Dry the Flowers
Once your flower is covered in the paint mixture, gently shake off any excess paint back into your container and put them face down on a drying rack so that any extra paint can drip off of the petals. I like to use cookie racks from the dollar store with pans underneath to catch any spare paint.

Once the excess paint mixture has dripped off the flowers, you can turn them right-side up to finish drying. At this point, you can fluff, shape, and pluck any petals that are damaged.
While the flowers are drying, make sure that you move them around, so they do not stick to your drying surface. I usually shift mine around twice in a 24 hour period to avoid any sticking. If you do have sticking, you can carefully peel the flower from the surface and shift it around. Let the flowers dry completely before using or storing them.

Since sola wood flowers are made of wood, they can mold if not dried completely. It’s best to let them dry for at least 24 hours before use. Always check the back/middle of the flower to ensure the area where the flower is tied together is dry. If you are storing the flowers for later, make sure you do not put them in an airtight container. The flowers should be stored in a temperature-controlled area with air flow.

Other Techniques For Dyeing Sola Wood Flowers
There are so many different painting techniques that you can use to make your sola wood flowers look beautiful. Some of the most realistic sola flowers I have painted were done with acrylic paint in an airbrush. Here are some of the other techniques I have used or seen others use to paint their wood flowers:
- Airbrushing
- Dip-dyeing
- Painting with a paint brush
- Dip-dyeing more than once for multiple color effects
- Wetting the flower and painting the tips of petals for a bleed effect
Once you experiment more with painting sola wood flowers, you will learn how the material works with paint and discover techniques you like. Luckily, these flowers are fairly inexpensive, and you can purchase enough to experiment before starting your next project.
Examples of Sola Wood Flowers Dyed/Painted with More Advanced Techniques


